Add custom alarms. Add the Cobalt Robotics source to your Monitoring Zones.
1) Add Custom Alarms
Cobalt would like to auto-configure the following, but at this point OnGuard OpenAccess does not support this. Once Cobalt has created its Logical Source, please perform the following step in the System Administration tool.
After this site, Cobalt's alarm priorities and colors will show up properly in OnGuard.
Note: These are just Cobalt's recommendations for alarm settings. Feel free to modify these as you discover what works best for your workflow.
-
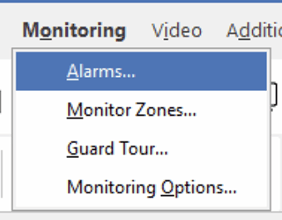
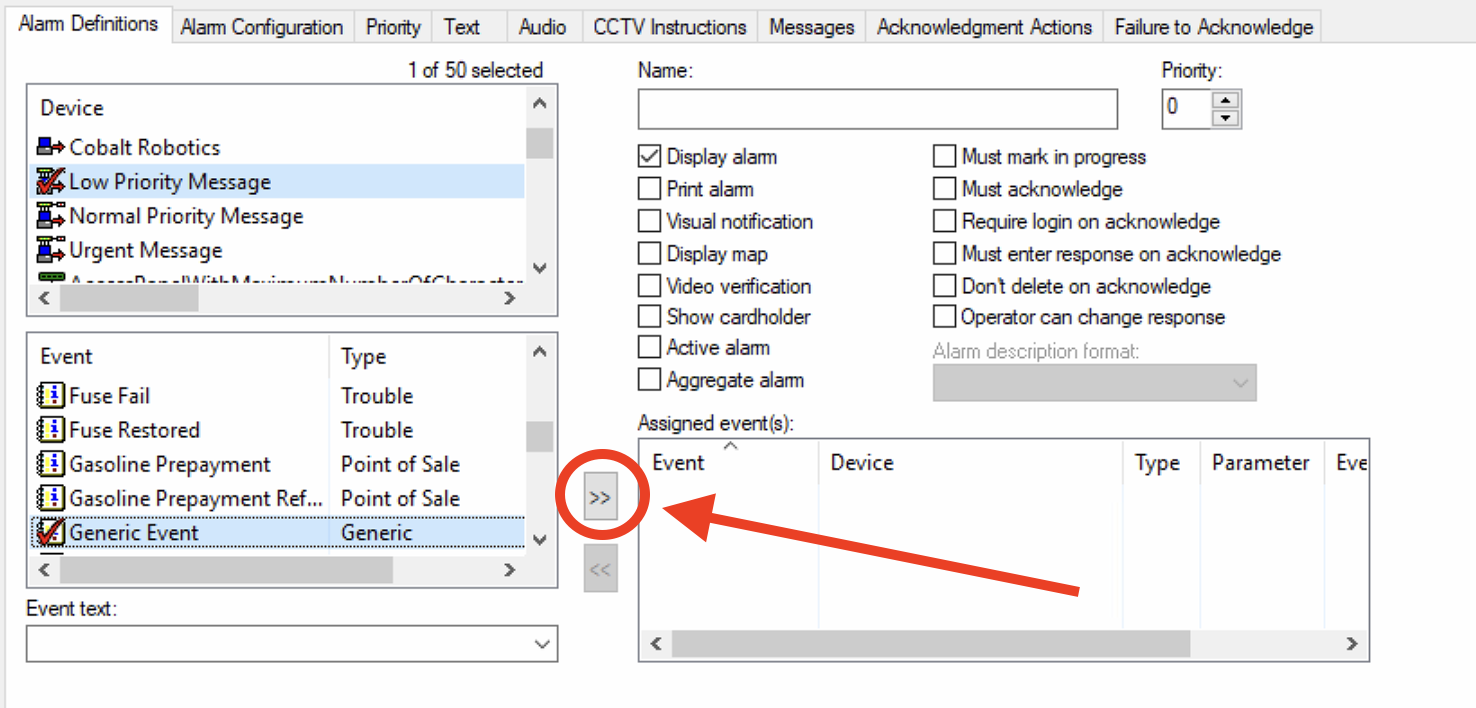
- From the System Administration tool, choose the "Monitoring" => "Alarms..." menu.
- Add a new alarm
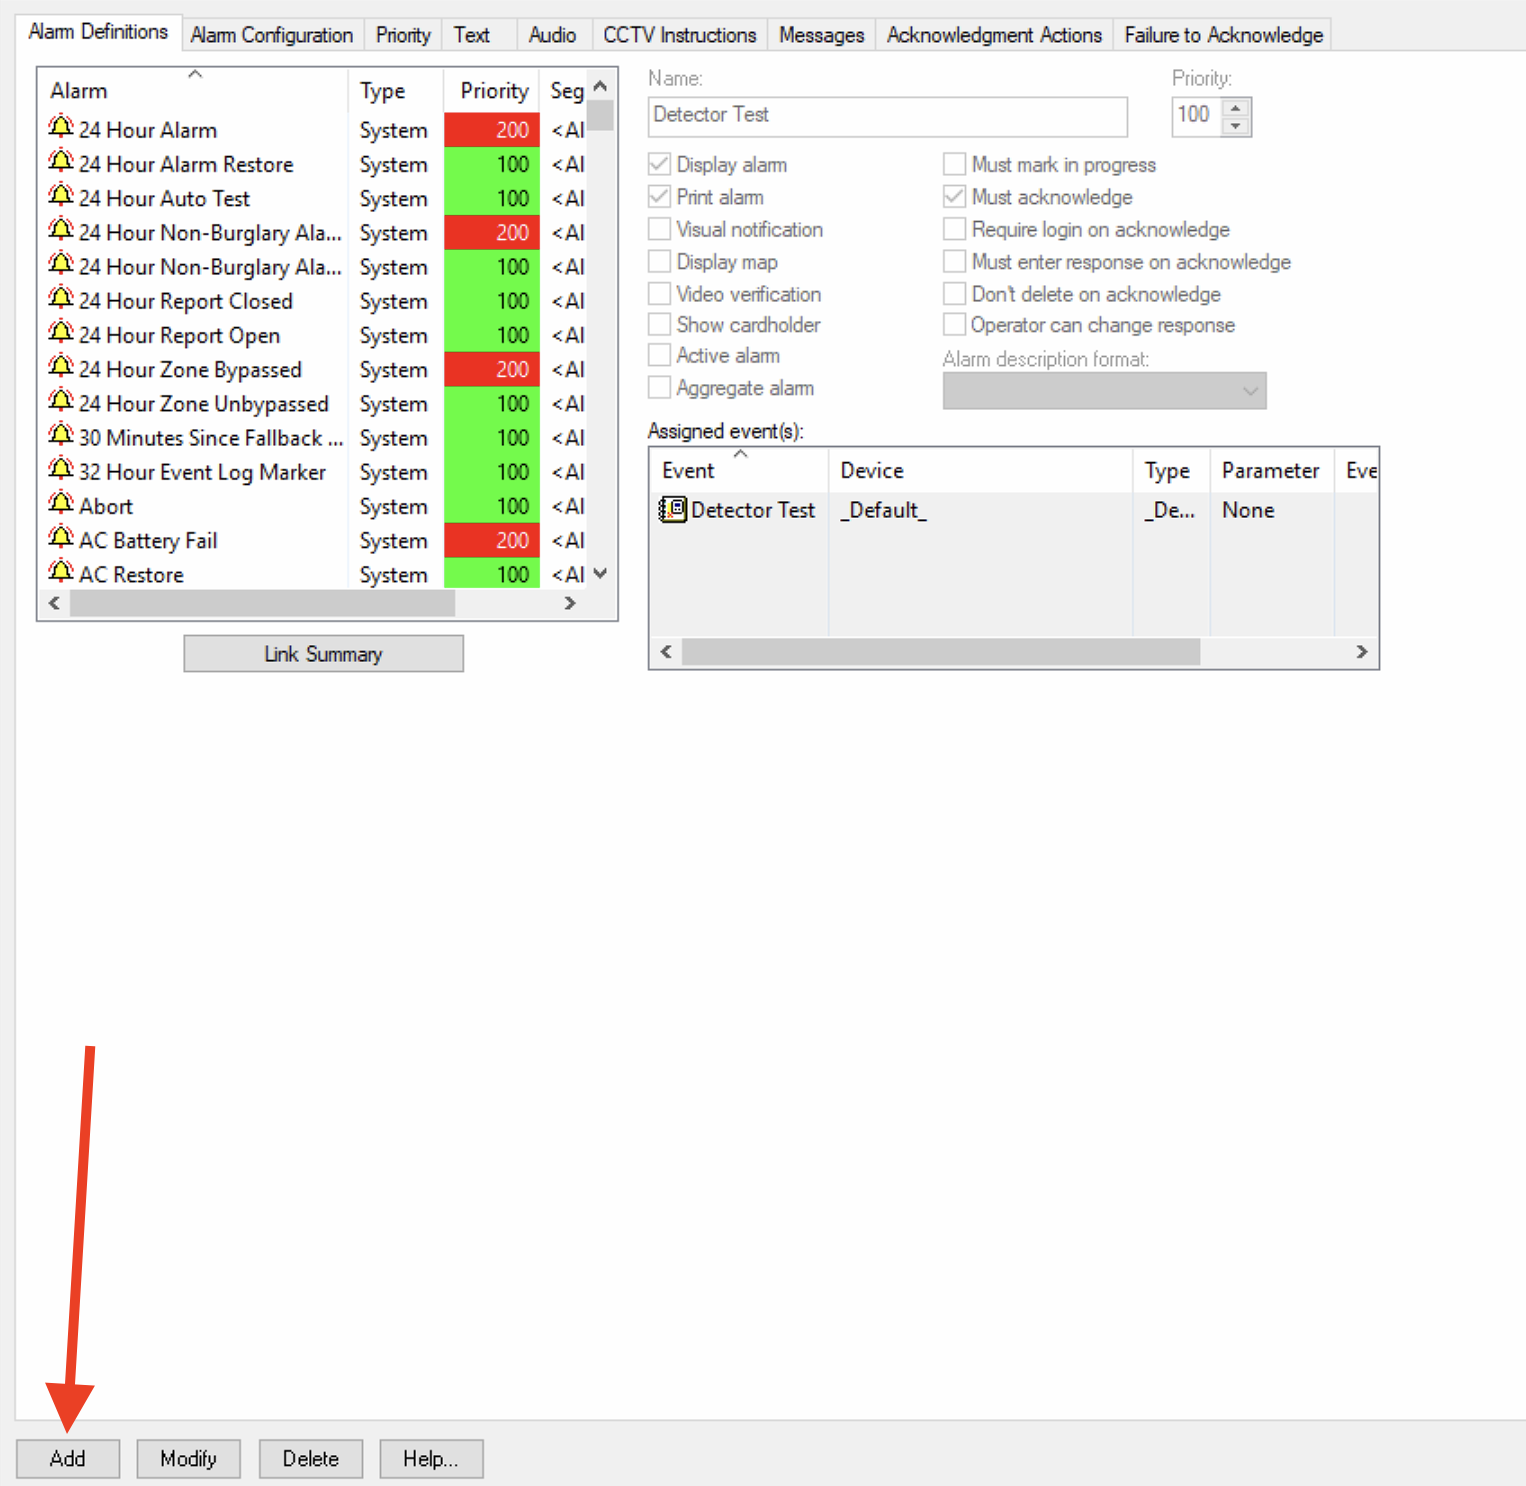
- (If you use Segments) choose "All Segments"
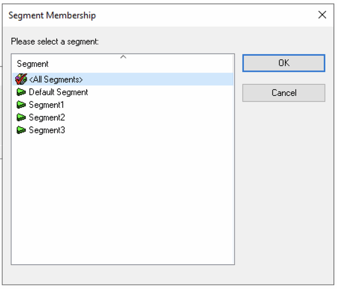
- Select the "Low Priority Message" from the Device list. (You need to click the icon to select it.)
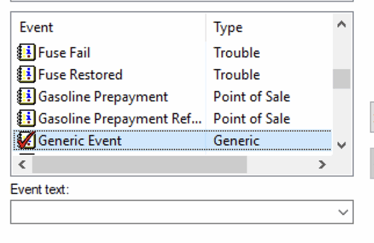
- Select "Generic Event" from the Event list. (Again, you need to click the icon to select the item.)
- Click the double right arrows ">>" to add the event to the list
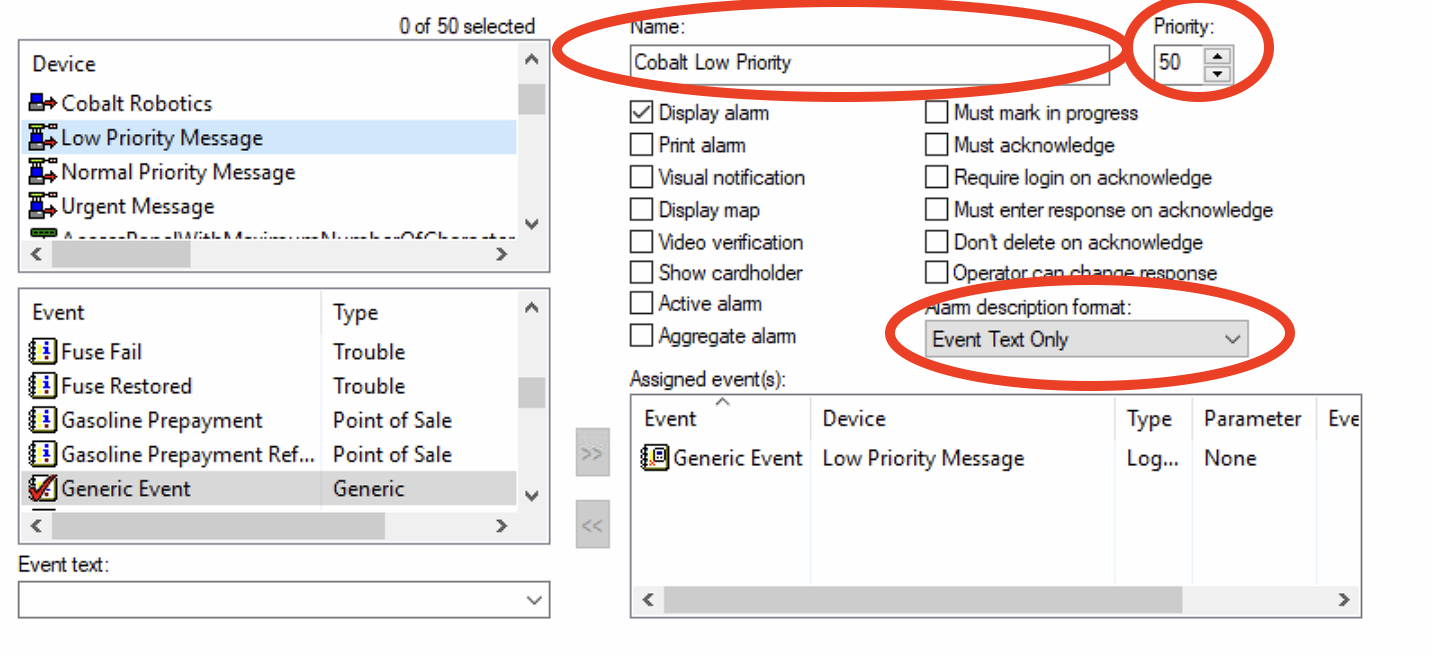
- Give the alarm the name "Cobalt Low Priority"
- Give the alarm a priority of "50"
- The alarm should now look like this
- Click "OK" to save the new alarm.
- From the System Administration tool, choose the "Monitoring" => "Alarms..." menu.
- Follow the exact same steps as above to configure the following other Cobalt alarms, with the following exceptions per device:
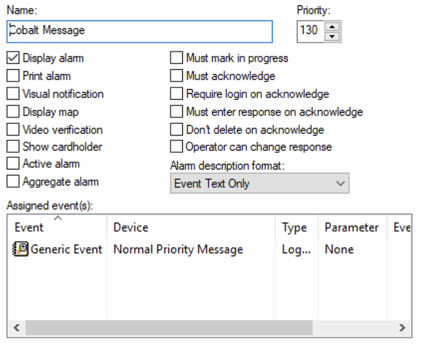
- For device "Normal Priority Message":
- Name: Cobalt Message
- Priority: 130
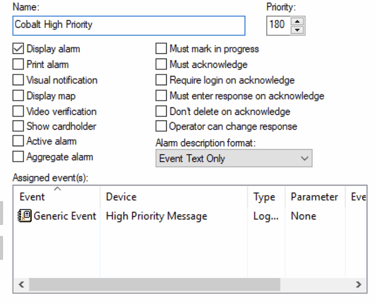
- For device "High Priority Message":
- Name: Cobalt High Priority
- Priority: 180
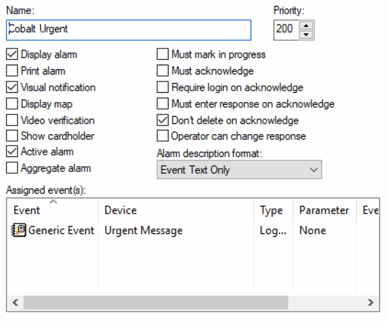
- For device "Urgent Message":
- Name: Cobalt Urgent
- Priority: 200
- Check the Active alarm box
- Check the Visual notification box
- Check the Don't delete on acknowledge box
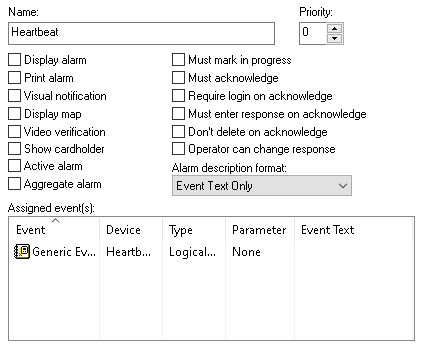
- For device "Heartbeat":
- Name: Heartbeat
- Priority: 0
- Uncheck Display alarm
- For device "Normal Priority Message":
2) Add Cobalt's logical source to Monitoring Zones
-
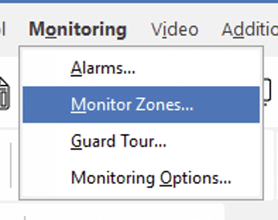
- In the Administration Tool, go to the "Monitoring" => "Monitor Zones" menu.
- For each zone that you want to see Cobalt alarms for:
- Select the zone (red check mark)
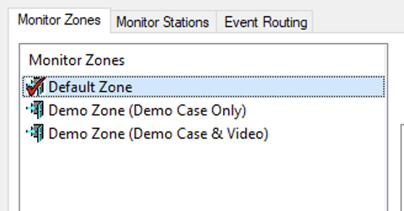
- Click "Modify"

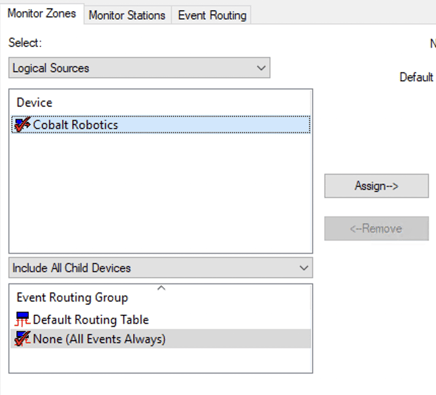
- Select "Logical Sources" from the dropdown menu

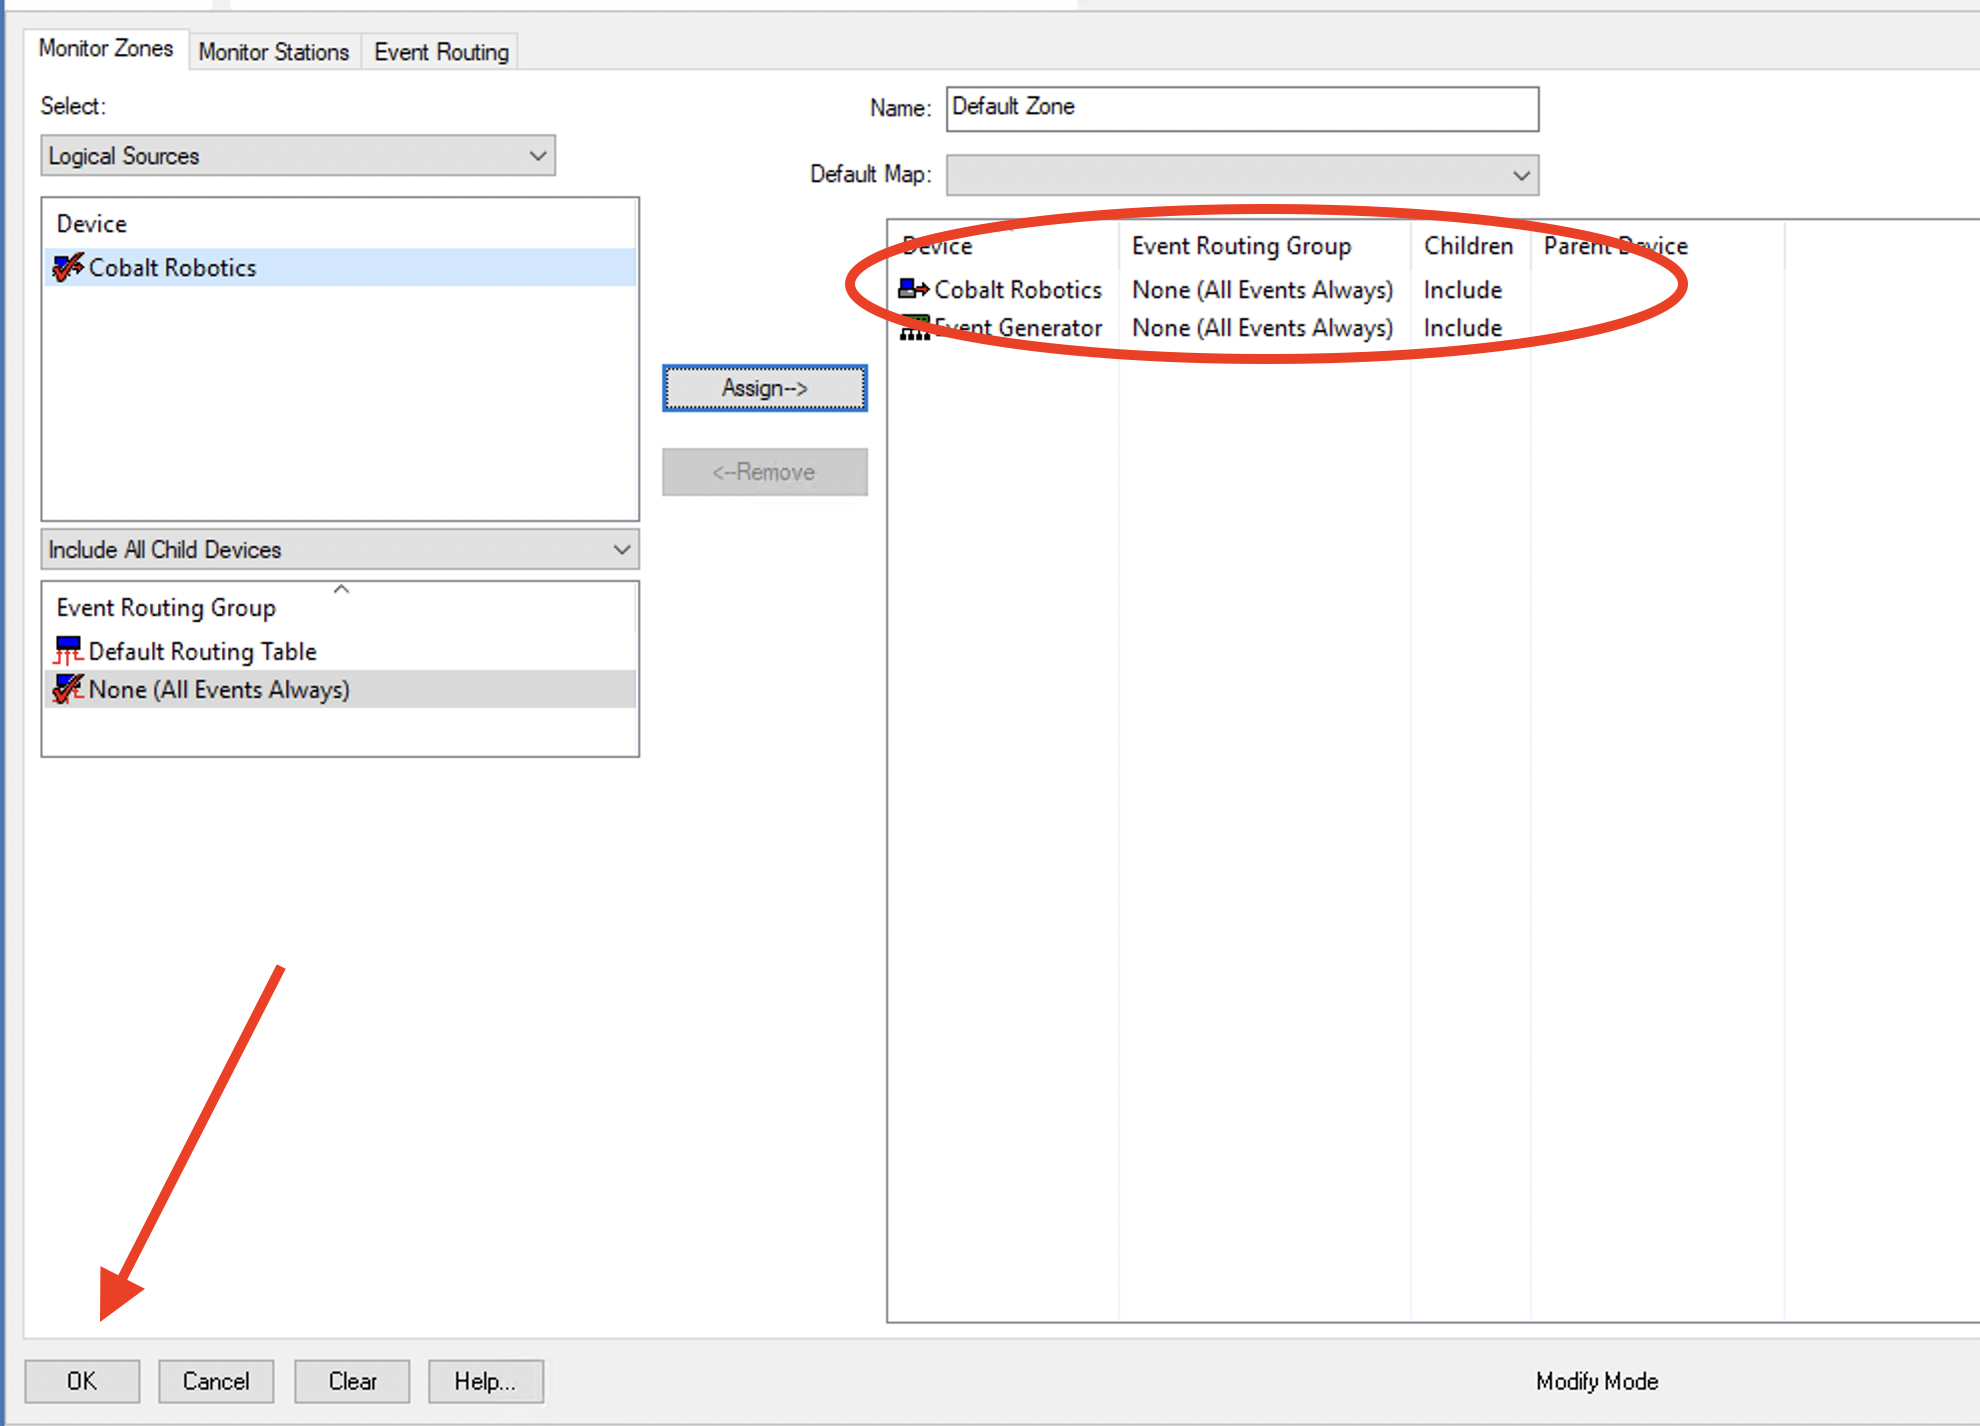
- Select "Cobalt Robotics" (red check mark). Also Select "Include All Child Devices". Finally, click Assign.
- You should see "Cobalt Robotics" in the zone now. Click OK to save.
- Select the zone (red check mark)
- In the Administration Tool, go to the "Monitoring" => "Monitor Zones" menu.